
How to install Duct heaters?
Duct heaters are major parts of HVAC systems that give a temperature control of air by means of ducts. They serve as a convenient method for heating and evenly keeping a comfortable indoor climate in homes, offices, and industries by passing heated air through ductwork.
To install Duct heaters, you needs to be properly done and safeguarded scientifically. Installation not only just helps keep it functioning at maximum efficiency today but also helps it keep going for a longer time and minimize the chance of being dangerous at some point.
This article discusses the fundamental things that you should do for the correct installation and safety of duct heaters to guarantee both safety and performance.
What is a Duct Heater?
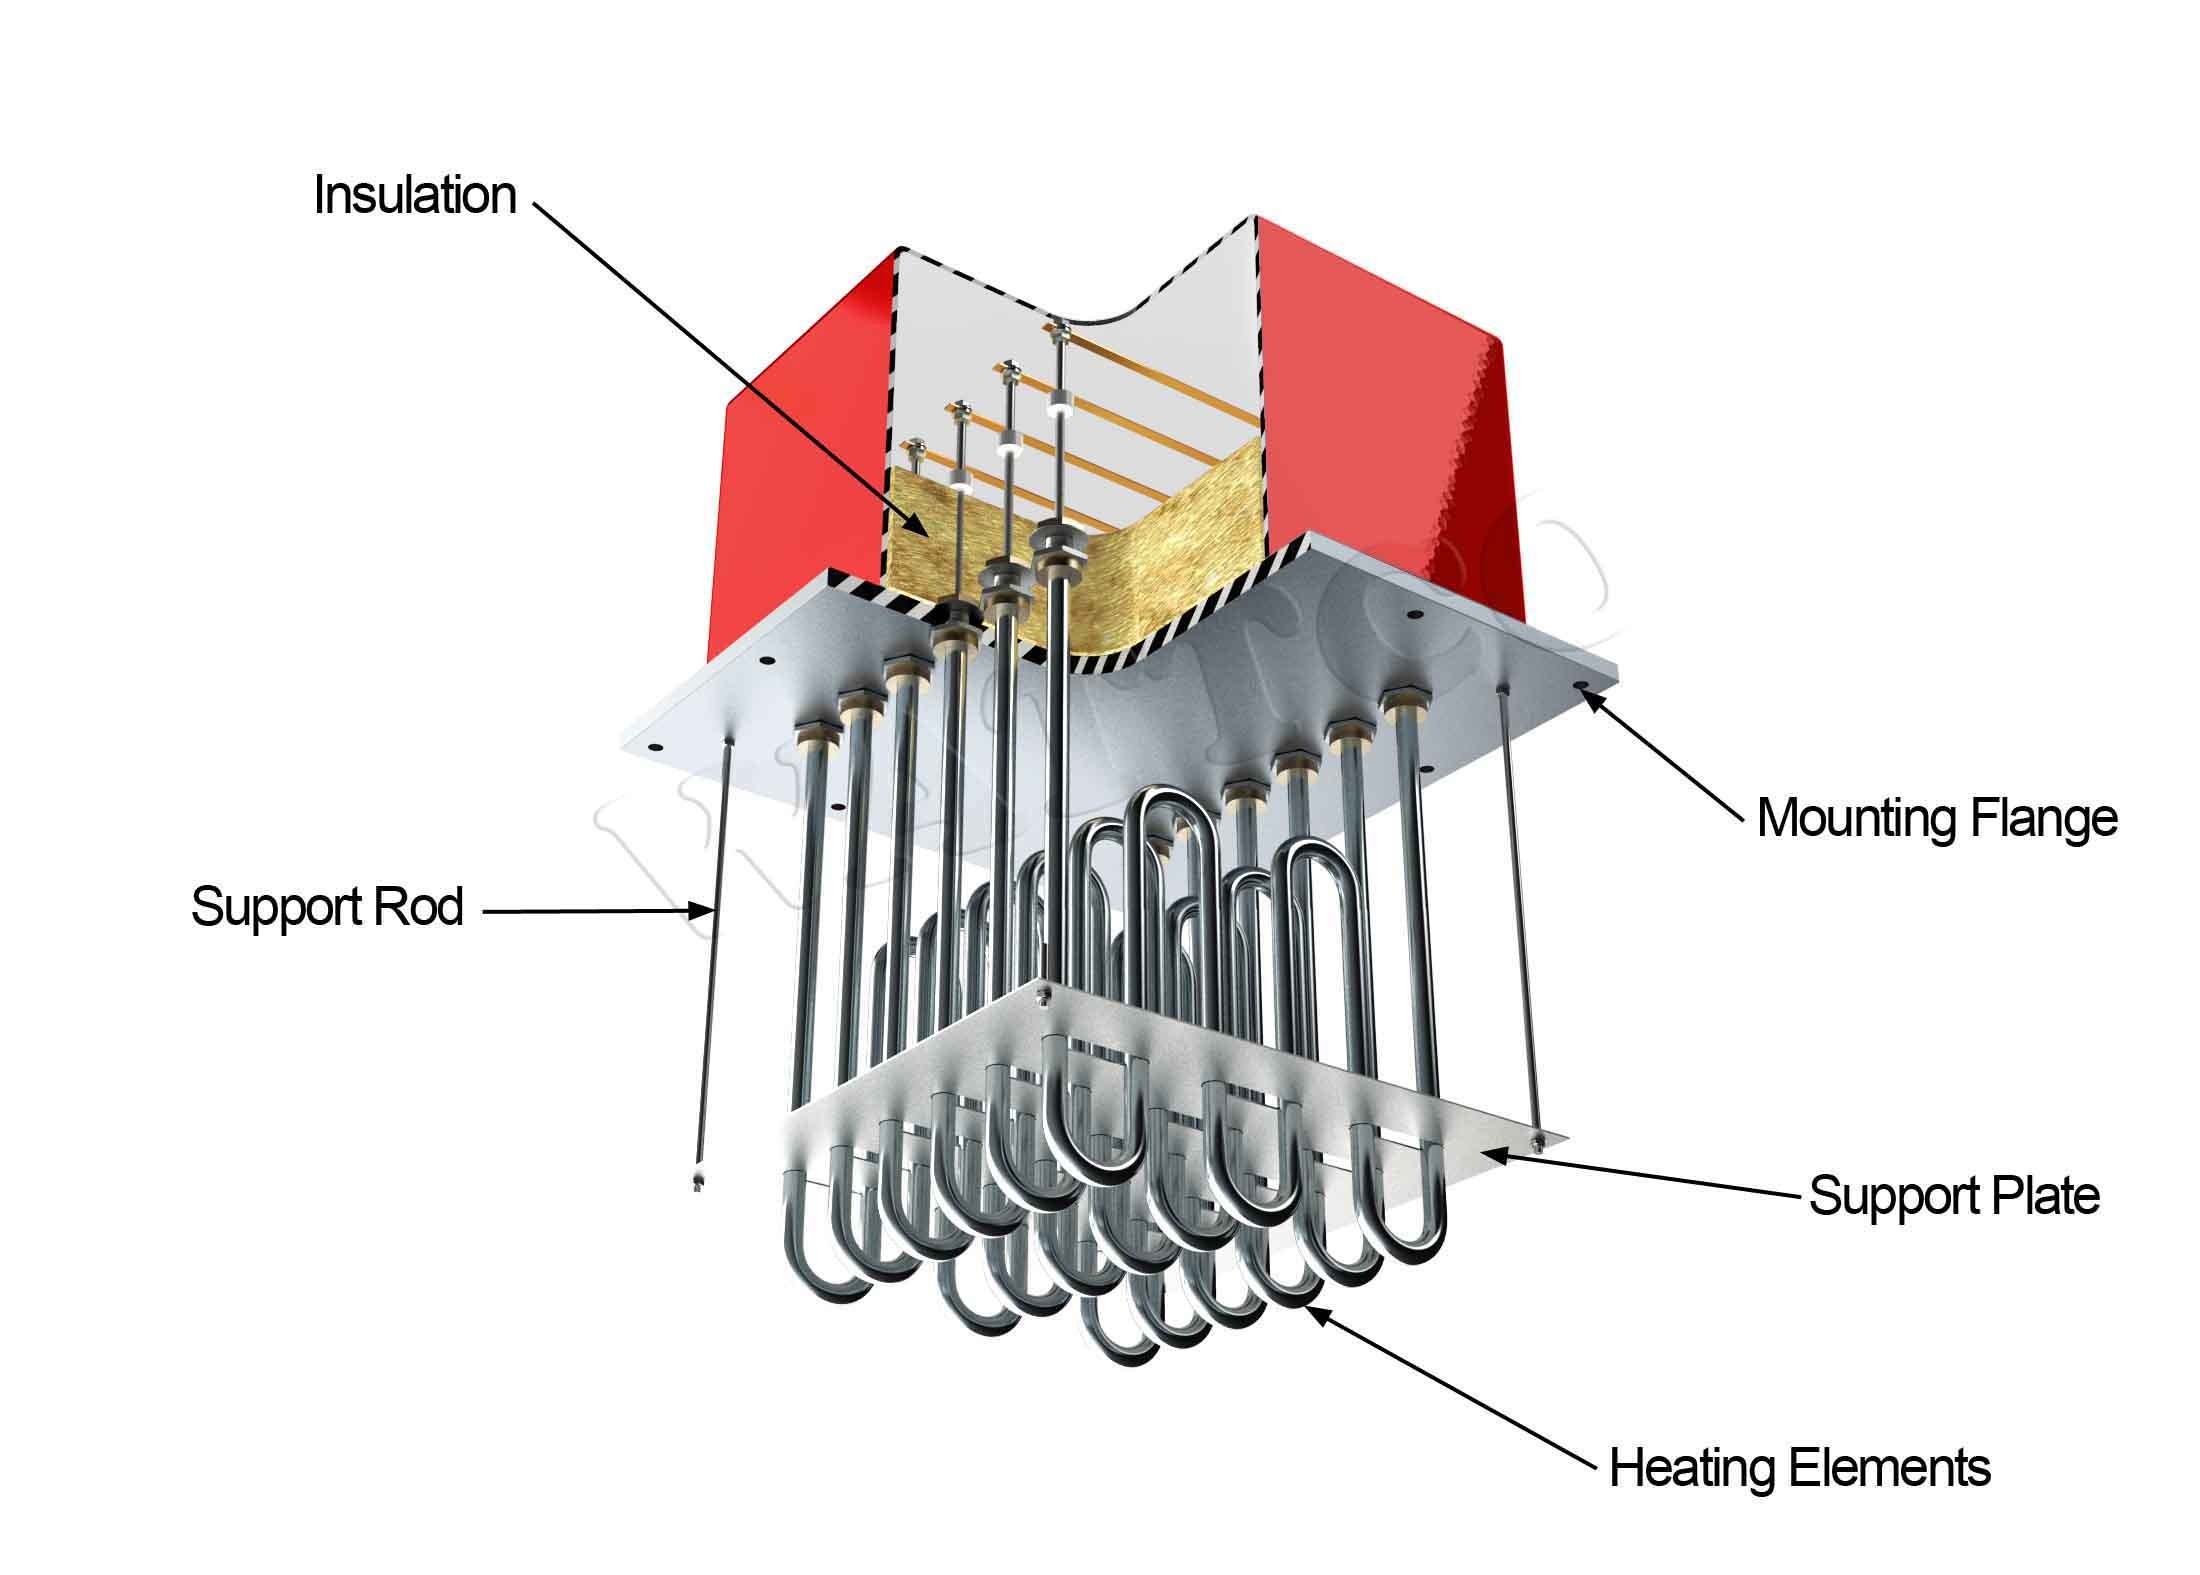
Types of Duct Heaters:
- Electric Duct Heaters: Depending on electricity, electric duct heaters are versatile, small size models so can be used for a number of different applications. They usually come with programmable thermostats and safety functions. Electric duct heaters are particularly favoured for easy installation and low maintenance needs, and are great for residential / small commercial use.
- Hot Water Duct Heaters: These use the hot water from a boiler setup to heat air that goes through ducts. They are good for large-scale operations and most energy-efficient. They are great because they run off of their own gravity fed steam system necessary for industrial types of contractors or buildings that have an existing hydronic system.
- Steam Duct Heaters: They are used in industrial applications where many heat units are required to operate, these units draw steam as the heat source. Steam duct heaters or Steam heaters are frequently combined in manufacturing facilities or large-scale industry processes where steam is available.
Common Applications
Duct heaters are widely used in office buildings, hospitals, warehouses, and residential complexes. They provide local heating solutions and boost air distribution in HVAC systems. These devices also play a key role to maintain a controlled environment, like cleanrooms and labs.
Preparation before Installation
Tools and Materials Required
Before beginning the process of installation, you need to collect these tools and materials:
- Screw-drivers
- Drill and mounting tools
- Wire cutters and adapters
- Device for measuring electrical connections.
- Measuring tape
- Personal protective equipment (PPE)
- Installation guide
- Sealant or duct tape for airtight connections
Safety Precautions
- Power Shutdown and Lockout Steps: Turn off the power supply to the HVAC system to avoid electrical dangers during setup. Use lockout/tagout (LOTO) devices to keep the system from turning on by accident.
- Protective Gear: Ensure wearing safety equipment to protect yourself from potential injuries. Also, check that the work area has enough lighting and airflow to keep things safe.
- Check Local Rules: Review local building codes and safety guidelines to ensure you’re following the correct procedures when installing the system.
Choosing the Right Spot
Things to Keep in Mind
Where you put the duct heater matters a lot. Keep these points in mind:
- Air Flow Needs: Put the heater in a part of the duct where air moves well to stop it from getting too hot. Not enough air flow can make it work less well and might hurt the heater.
- Duct Size: Make sure the heater fits in your current ductwork. Measure the duct size carefully so you don’t run into fitting problems.
- Easy to Get To: Pick a spot where you can reach the heater to fix or take care of it. The heater should not obstruct other HVAC components or be positioned in inaccessible areas.
- Close to Power: Put the heater near the power source to use less wiring. This can help cut down on electrical resistance and setup costs.
Making Sure It Works with HVAC Systems
Check if the duct heater you’ve picked works well with your current HVAC setup. Look at things like voltage, amperage, and how it’s controlled. Take a look at what the maker says to make sure the heater fits with how your system runs.
Step-by-Step Installation Process
Getting the Ductwork Ready
- Clean the duct and measure the part where the heater is to be mounted. Use a vacuum or a moist rag to clean the interior of the conduit and get rid of any dust.
- Mark the positions where the underpinning classes of a heater will be installed. Make sure the marks correspond with the direction of airflow and the size of the heater.
Mounting of the Duct Heater
- Position the heater in line with the direction of the duct’s airflow such that the heating elements point the right side. This is important to enable rear airflow, which could otherwise impede performance.
- Fasten the heater firmly to the duct using mounting hardware. Strain all bolts and screws to stop shaking while in use.
Electrical Wiring and Connections
- Connect the heater using the manufacturer’s wiring diagram as a reference to the correct power source. To keep overload of the circuit from occurring, double-check the voltage and amperage specifications.
- Wiring the Control Panel: Plug the wires into the HVAC panel or thermostat and make sure they’re tightly connected.
- Make sure the heater is safely grounded to follow rules and keep things safe. A good heater setup helps stop problems and shocks.
Connecting the HVAC System.
Link the duct heater’s controls to the HVAC system, enabling flawless operation and integration. Verify that the control links respond straight to thermostat adjustments.
Inspections after installation
Checking the connections and cabling
Check to guarantee all mounting brackets and electrical connections are aligned and safe. Loose connections can lead to operational problems or safety hazards.
Functional testing
Switch on the power and check how the heater works. Look for appropriate temperature control and air circulation. Keep track of the heater for several minutes to make sure it runs without hitches or overheating.
Ensuring Compliance to Local Building Regulations
Check to see if the setup complies with industry norms and municipal laws to mitigate operational problems or financial penalties. Call for an inspection per the needs of your local government.
Maintenance and troubleshooting
Regularly scheduled cleaning and examination
Clean the heater often so that any dust and debris that can gather on the heating elements and sensors is eliminated. Check each cleaning for signs of wear or damage in the cables and connections.
Dealing with Typical Problems
- Examine the air flow and change the thermostat settings if needed. Restricted airflow and an overheating heater result from blocked ducts or unclean filters.
- Make sure the duct is clear and the heater is working properly. Check that the thermostat is set correctly.
- Find possible problems by checking the control panel and electrical connections. Replace defective components as appropriate.
When to Contact a Specialist?
If the heater is defective or frequently experiencing issues, you may consider contacting a professional. Expert assessments can help avoid additional damage and ensure the system operates efficiently and safely.
Conclusion
Installing a duct heater is a methodical operation that calls for careful organization and execution. Knowing the kinds of duct heaters, being ready, and following the provided instructions leads to a secure and successful installation. By doing so, regular upkeep helps the system last longer and run better so offering dependable heating for many years.
Good installation not only enhances energy efficiency but also helps to make the occupants’ experience more secure and relaxing. Following these rules will help you have a well-controlled indoor atmosphere and maximally operate your HVAC system. Detailed attention and best practices compliance will guarantee your duct heater runs effectively, therefore offering a safe and pleasant environment for all.
WATTCO also manufactures other industrial heating products such as infrared heaters, control panels, immersion heaters, and more.